Sitecore 9.0 XP1 Client Certificates Guide
Unweaving the Client Certificates required for an 9.0 XP1 scaled implementation can be a bit of a challenge, as there are several undocumented steps that need to be undertaken.
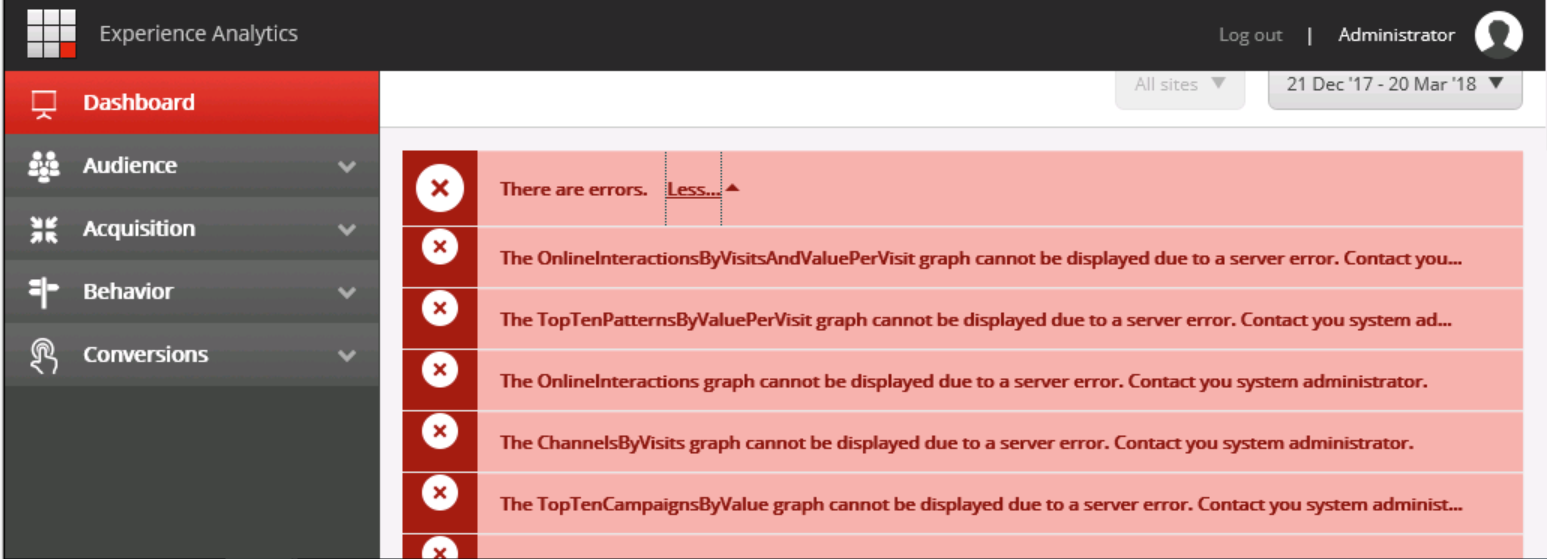
Often, many will export and import the correct certificates, update connectionStrings to use the proper ThumbPrints, but not update the SSL Settings for the IIS xConnect sites to allow Client Certificates… and set the permissions of the actual certificates to include the communicating Application Pools (such as the SitecoreCMS Application Pool) with the xConnect sites which results in an error as follows:

This guide assumes you are creating a full XP1 scaled environment with the 5 distinct xConnect roles of xConnectCollection, xConnectCollectionSearch, xConnectMarketingAutomationOperations, xConnectMarketingAutomationReporting, and xConnectReferenceData. It also leverages the SIF (Sitecore Installation Framework) to create and install Self-Signed Client Certificates.
As communication with xConnect from the Sitecore CMS, CDS, Processing, and xConnectMarketingAutomationOperations requires Client Certificates to validate that the HTTP Client (ex. Sitecore CMS) is authorized to connect to the HTTP Server (ex. xConnectCollectionSearch and other xConnect Roles), it is imperative to ensure that the Client Certificates are properly created, installed, referenced, and permissible.
This is achieved in the following steps:
Contents
Create Self-Signed Client Certificates
Using SIF to create the Client Certificate for its corresponding role is one method that SIF is well intended for. As an example, the following creates a Client Certificate named xConnectCollectionClient and can be called in its own install file (ex. create all of your certs in one PowerShell script) or as part of the install script used to create the xConnectCollection role (Preferred method as the SIF install for a role is looking for a Client Certificate value in its JSON).
# Install Client Certificate for xConnect Collection
   $certParams = @{
   Path = "C:\myinstallpath\xconnect-createcert.json"
   CertificateName = "xConnectCollectionClient"
   }
   Install-SitecoreConfiguration @certParams -Verbose
You would change the CertificateName parameter value to create the other desired Client Certificates that align to the role you are installing (i.e. xConnectReferenceData).
Per the following table, you need to create a total of 5 Client Certificates for an XP1 scaled build, which align to the 5 xConnect roles of xConnectCollection, xConnectCollectionSearch, xConnectMarketingAutomationOperations, xConnectMarketingAutomationReporting, and xConnectReferenceData. Important: The current Sitecore 9 Update 1 documentation incorrectly lists that the Reporting role requires the xConnectCollection Client Certificate, but it does not/it is not part of its connectionString.
| XP Scaled (XP1) Role Name | Client Certificate | Associated connection strings containing client thumbprint |
| Content Management | xConnect Collection Search
xDB Reference Data xDB Automation Operations xDB Automation Reporting |
xconnect.collection.certificate
xdb.referencedata.client.certificate xdb.marketingautomation.reporting.client.certificate xdb.marketingautomation.operations.client.certificate |
| Content Delivery | xConnect Collection
xDB Reference Data xDB Automation Operations xDB Automation Reporting |
xconnect.collection.certificate
xdb.referencedata.client.certificate xdb.marketingautomation.operations.client.certificate xdb.marketingautomation.reporting.client.certificate |
| Reporting | None required | |
| Processing | xConnect Collection | xconnect.collection.certificate |
| xConnect Collection | None required | – |
| xConnect Collection Search | None required | – |
| xDB Reference Data | None required | – |
| xDB Automation Operations | xConnect Collection
xDB Reference Data |
xconnect.collection.certificate
xdb.referencedata.client.certificate |
| xDB Automation Reporting | None required | – |
Export and Import Self-Signed Client Certificates to the Correct Servers
Once you have created the Self-Signed Client Certificates, they will reside in the (Local Computer)\Personal folder. You can view the certificates using an MMC Console and adding the Certificates Snap in for your Local Computer.
As these certificates will need to also reside on the server whose role is communicating with xConnect (ex. CMS Server on one server and xConnectCollectionSearch on another server), you will need to export the certificates from where they were created and import them to the proper server. Use the table in the previous section to determine which Client Certificates belong with which role, or view the connectionStrings of your role to determine the necessary certificates (look at the endpoint URL to determine the Client Certificate).
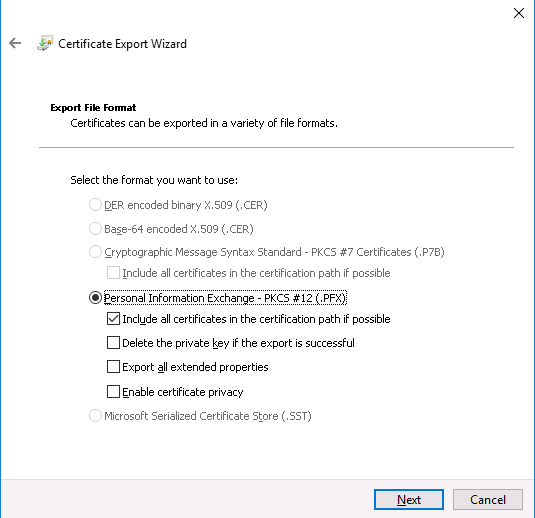
If you right click on a given certificate, you can export it as a PFX file.


Please note that you must export the Private Key and set a password. Also, per Sitecore documentation:
“When you import the client certificate, you must select the Allow private key to be exported option. If you created a self-signed certificate, you must install the self-signed authority certificate used to create the client authentication certificate in the following folder: Certificates (Local Computer)\Trusted Root Certification Authorities folder.”
If you do not want to manually export and import Client Certificates, you can use the following PowerShell as a sample:
# Export xConnectCollection Client Certificate
$certificateSubject = "xConnectCollectionClient"
$thumbprint = (Get-ChildItem -Path Cert:\LocalMachine\my | Where-Object {$_.Subject -eq "CN=$certificateSubject"}).Thumbprint;
Write-Host -Object "My thumbprint is: $thumbprint";
$pwd = ConvertTo-SecureString -String ‘1234’ -Force -AsPlainText
$path = 'cert:\localMachine\my\' + $thumbprint
Export-PfxCertificate -cert $path -FilePath "C:\MyCerts\xConnectCollectionClient.pfx" -Password $pwd
# Import xConnectCollection Client Certificate
Import-PfxCertificate –FilePath "C:\MyCerts\ xConnectCollectionClient.pfx" -CertStoreLocation 'Cert:\LocalMachine\My' -Password "1234" -VerboseImportant: Your Client Certificates require the matching Root Certificate exported as well. This normally looks like a DO_NOT_TRUST_SitecoreRootCert for Client Certificates.
Server Certificates, if exported, also require their Root Certificate named something like “DO_NOT_TRUST_SitecoreFundamentalsRoot”.
Please note that SIF generates and uses the Root Certificate to be a reference for all Client Certificates created on the source machine (the one you are exporting from) so check the thumbprints and match the Clients to the Roots. If you have a separate server per role, you would conceivably have multiple DO_NOT_TRUST Roots imported to each server.
Here is an example of Exporting and Importing a Root Certificate that corresponds to Client Certificates on your source machine (the one you will export certs from):
# Export Client Root Certificate

$certificateSubject = "DO_NOT_TRUST_SitecoreRootCert, O=DO_NOT_TRUST, OU=Created by https://www.sitecore.net"

$thumbprint = (Get-ChildItem -Path Cert:\LocalMachine\Root | Where-Object {$_.Subject -eq "CN=$certificateSubject"}).Thumbprint;

Write-Host -Object "My thumbprint is: $thumbprint";

$path = 'Cert:\LocalMachine\Root\' + $thumbprint

Export-Certificate -cert $path -FilePath C:\Certificates\Export\xConnectCollectionServerRootCert.cer
# Install Client Root Certificate

Import-Certificate -FilePath "C:\Certificates\xConnectCollectionServerRootCert.cer" -CertStoreLocation Cert:\LocalMachine\Root
Update connectionStrings with the Correct ThumbPrints per Role
Once you have the proper Client Certificates imported on the desired servers (ex. SitecoreCMS needs the xConnectCollectionSearch, xConnectMarketingAutomationOperations, xConnectMarketingAutomationReporting, and xConnectReferenceData Client Certificates), you need to update the connectionStrings to reference the proper ThumbPrints. The first step is to get the ThumbPrint for each certificate.
# Get Client Certificate ThumbPrints Installed on the Local Machine
Get-ChildItem -path cert:\LocalMachine\My
Once you have a listing of the Client Certificates ThumbPrints, update the corresponding connectionString. As an example, for the URL of https://xConnectCollectionSearch, set the ThumbPrint value that aligns to the xConnectCollectionSearch Client Certificate.
xConnectCollection Search EndPoint with ThumbPrint Value of A1842F3094F99C5D234360A8BCC6C39BD29D553W
<add name="xconnect.collection" connectionString="https://xConnectCollectionSearch" />
<add name="xconnect.collection.certificate" connectionString="StoreName=My;StoreLocation=LocalMachine;FindType=FindByThumbprint;FindValue=A1842F3094F99C5D234360A8BCC6C39BD29D553W" />
IIS SSL Settings to Allow Client Certificates and Application Pools per Client Certificate
Once your connectionStrings across the CMS, CDS, Processing, and xConnectionMarketingOperations roles have been set with the proper ThumbPrints, you will need to ensure that they can communicate with the actual xConnect sites. This is a two-step process where you must first allow Client Certificates to be accepted by the xConnect site.
SSL Settings in IIS for the site (all 5 xConnect sites require Client Certificates to be allowed)

Post allowing Client Certificates, you must add the Application Pool of each connecting site to the xConnectClient Certificates. For example, the Application Pools for the Sitecore CMS, CDS, and xConnectMarketingAutomationOperations all need to be added to the xConnectReferenceData Client Certificate permissions (Right Click > All Tasks > Manage Private Keys). In a scaled environment with multiple servers, this can be made easier by leveraging domain accounts for your Application Pools.

Once you complete this step, you should have successful communication with xConnect via Client Certificates. Review the Sitecore logs for any other network or communication issues, and if you don’t see any results in Experience Analytics, you may need to rebuild the Reporting Database.

Interesting read, I’m still wrapping my head around the many novelty that 9.1 introduces and the SSL conundrum is one of these.
I noticed that after running XP1-SingleDeveloper.ps1 the script already generates 11 (!) self-signed SSL certificates; why would I need to generate new ones when the setup already prepares self-signed certificates for me?
Hi Emanuele,
This post is for Sitecore 9.0. Sitecore 9.1 deploys its own SSL Certs.
Because you can’t use self-signed certs in Production.
Why not use self signed if they are behind the firewall and it is internal communication? Agree that you need a “proper” cert for the CMS where the public touches the server.
Great point. From a governance standpoint, it would be easier to leverage a single Public certificate (ex. SAN or Wildcard). Self-signed certs are also not as secure as a Public CA… so at least for Production you should consider a Public CA Cert. Also, a CMS server should never be publicly exposed… only the CD Servers. You can use a VPN or IP White listing to hit a CMS entry point.