Creating a Basic Sitecore Content Approval Workflow
Sitecore Workflows offer strong governance of content via a set of stages every piece of content needs to go through prior to publishing. While you can create complex workflows and add custom actions, sometimes a simple content approval workflow will meet most of your governance needs.
In this article we will review what a Sitecore workflow is, how to document a content approval workflow, and finally how to implement what you have documented.
Contents
What is a Sitecore Workflow
In its most basic form, a Sitecore Workflow helps to control the states a piece of content must go through before reaching its final state… which is usually being published. This is a critical component of Sitecore governance as it prevents unwanted or unedited content from being published.
Per Sitecore, the workflows section of the content editor is as follows:
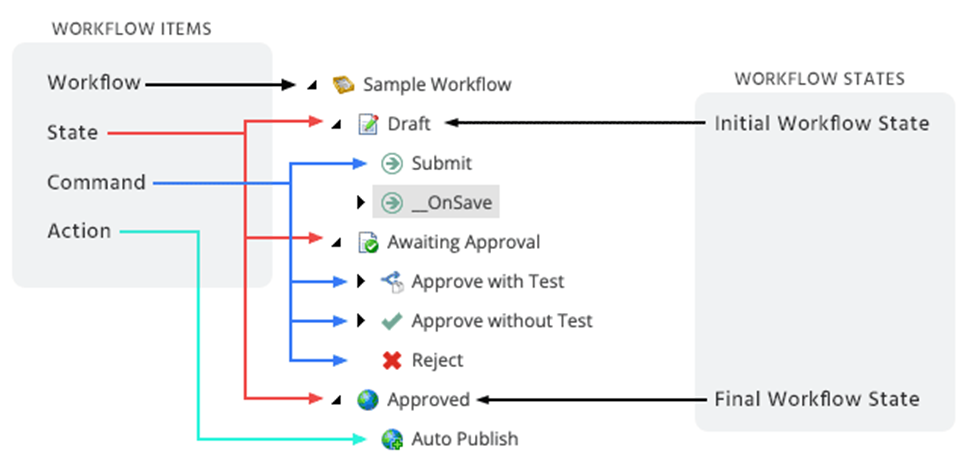
- Workflows – the parent item that contains all the subitems that make up the workflow.
- States – the basic building blocks of the workflow. The workflow states represent the different stages in your content creation process.
- Commands – move content items from one workflow state to another. When the command is executed, the item is moved to the workflow state that is defined in the command item.
- Actions – the actions that are automatically performed on the items when they are in particular workflow states or when particular workflow commands are executed.
Once a workflow has been created, it needs to be assigned to the appropriate template. This allows you to define which content a workflow is attached to.
Reviewing all the workflows, and taking additional actions, is available via the Sitecore Workbox.
Documenting a Sitecore Workflow
Before you attempt to implement a Sitecore workflow, as in our case of a Content Approval Workflow, it’s imperative to document the proposed workflow. This is broken into two aspects. The first is the high-level details along with the scope, states, commands, approvers, process and actions that the workflow will take. The second part is documenting the process (aka, walkthrough) of the workflow itself.
Documenting these two aspects helps to clearly see the start and endpoint of the workflow and surface important questions around goals, approvers, and complexity/governance.
Using our Content Approval Workflow as an example, it will look something like the following:
Content Approval Workflow High Level Details
Workflow Purpose: The Content Approval Workflow ensures that all items created flow through a content approval workflow process inside of Sitecore
Workflow Scope: Data template tied to all Sitecore items
States: Draft (Item created but not Submitted for Review), Awaiting Approval, and Approved (Auto-Publish)
Commands: Submit, Approve, Reject (Commands vary by stage and are listed in the workflow process)
Approvers: Content Manager (Who can approve and make decisions on workflows)
Workflow Process: See the Workflow Process below which details how to submit (Content Author) and how to evaluate (Content Manager) if an item is approved/un-approved inclusive of reviewing external content/items that affect the flow (ex. legal review, translation system, etc.)
Actions: Auto Publish (Automated actions to take)
Content Approval Workflow Process
- Content Author creates item in Sitecore as a Draft
- Draft worked on until the Content Author submits for review
- State: Draft
- Commands:
- Submit sends it for review
- The Content Manager reviews the submitted content and determines whether to reject or approve the content
- State: Awaiting Approval
- Commands:
- Approve automatically publishes the item
- Reject returns the item to Draft state
- Approvers: Content Manager for Reject and Submit for Publish
- Item is published
- State: Approved
- Actions: Auto Publish
Creating a Sitecore Workflow
Using the Content Approval Workflow documented above, we will proceed to create our workflow via the following steps. You can also follow the official Sitecore Inc. Workflow Cookbook (well worth a bookmark): Workflow cookbook | Sitecore Documentation
Step 1: Create the Content Approval Workflow
Navigate to /sitecore/System/Workflows within the Content Tree and create a workflow named “Content Approval”. Of note, you can create your own workflows and names as appropriate, but we are following the example documented in the previous section.
Step 2: Create the Content Approval States
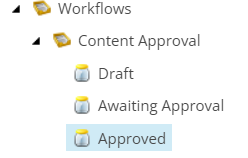
For our Content Approval workflow, we have 3 states of Draft, Awaiting Approval, and Approved. Create these by right clicking on the Content Approval Workflow and adding the states. Of note, re-order them to be in the order of execution:
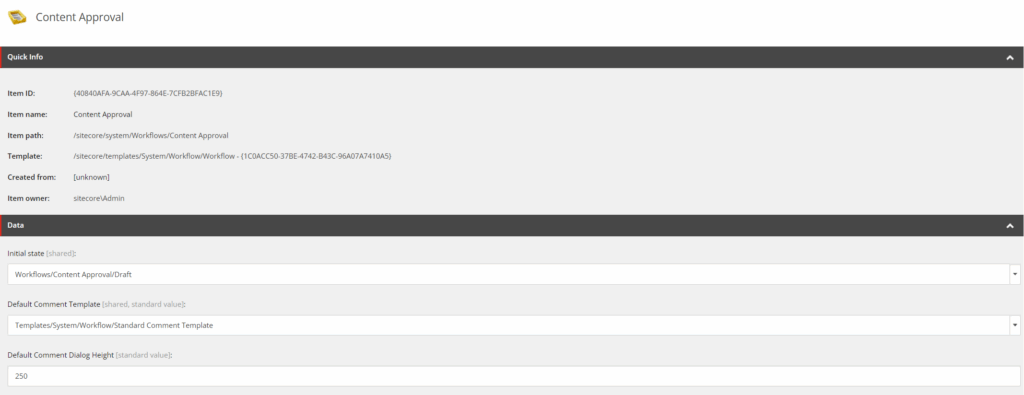
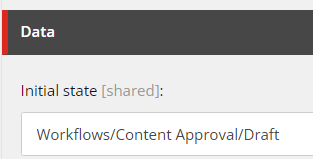
It is imperative to set the initial state in your workflow. In the content item of the Content Approval Workflow, set the Draft state as your Initial State:
Step 3: Add Commands and Actions to Your States
With the states created, we need to apply the commands (ex. Submitting a Draft state so when approved it moves to the Awaiting Approval state). To that end:
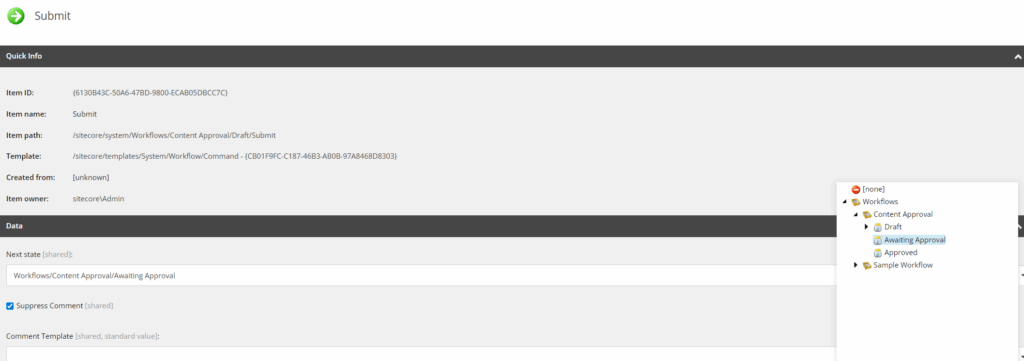
Draft: Right click the Draft state and insert a command named “Submit” and click into the “Next state” field which should produce a pop up where you can select the “Awaiting Approval” state as the Next state after Draft:
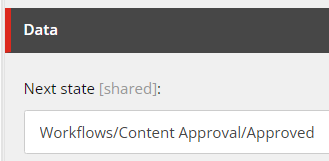
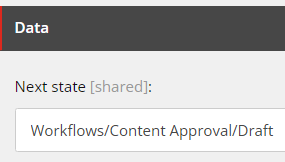
Awaiting Approval: The Awaiting Approval state will get two commands of Approve or Reject. Approve will have a Next state of “Approved” and Reject will revert to the Next state of “Draft” to send users back to the content item to make improvements before re-submitting for review.
Approved: Unlike the previous two states, this state gets an action assigned as we want it to auto publish as the final step. You can add actions to other states as well (ex. an Email action to notify Content Managers when a content item is in the Awaiting Approval state).
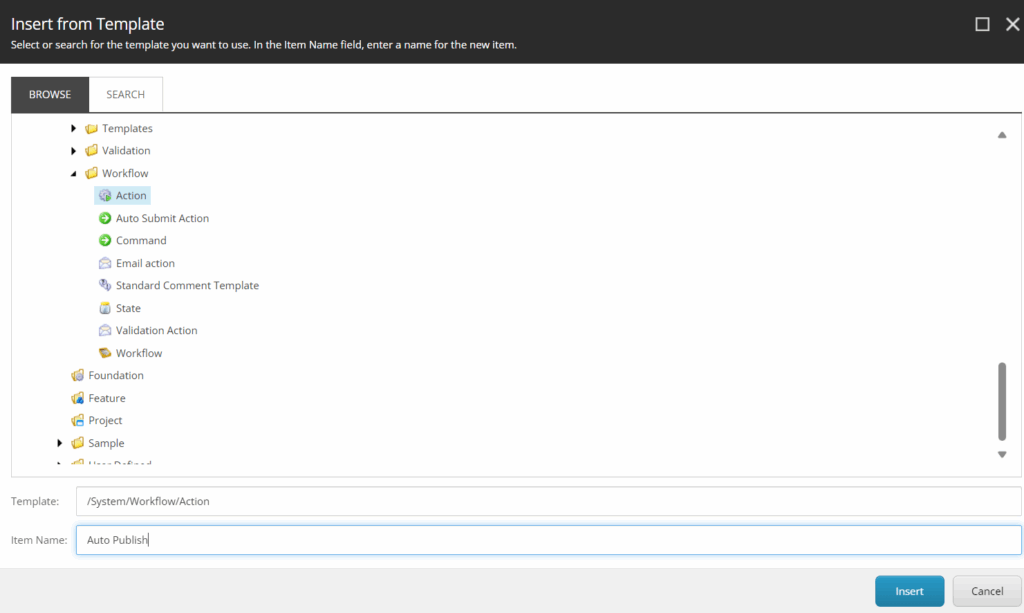
Right click on the Approved State and select “Insert from Template”. From this point browse the System > Workflow templates path and select “Action” as your template. Name the Action “Auto Publish”.
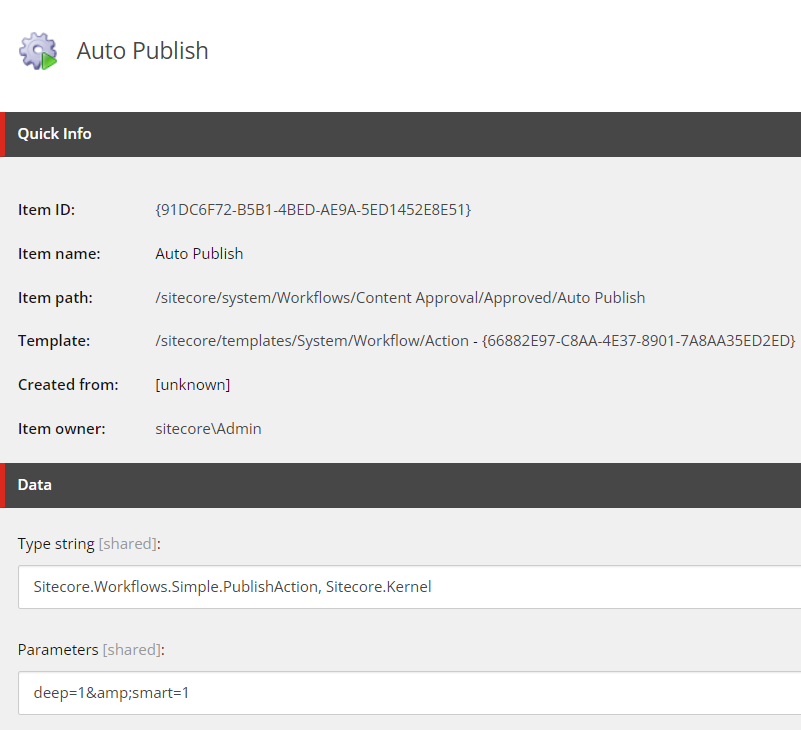
Now here is where it gets interesting, click on the Auto Publish action under the Approved state and fill in the following information to the respective fields:
Type: Sitecore.Workflows.Simple.PublishAction, Sitecore.Kernel
Parameters: deep=1&smart=1
This tells Sitecore what custom code and parameters you want for this action. This is powerful as beyond the default actions, you can create your own custom actions and reference it with an action… but for now, use the Type and Parameters above so we can auto publish.
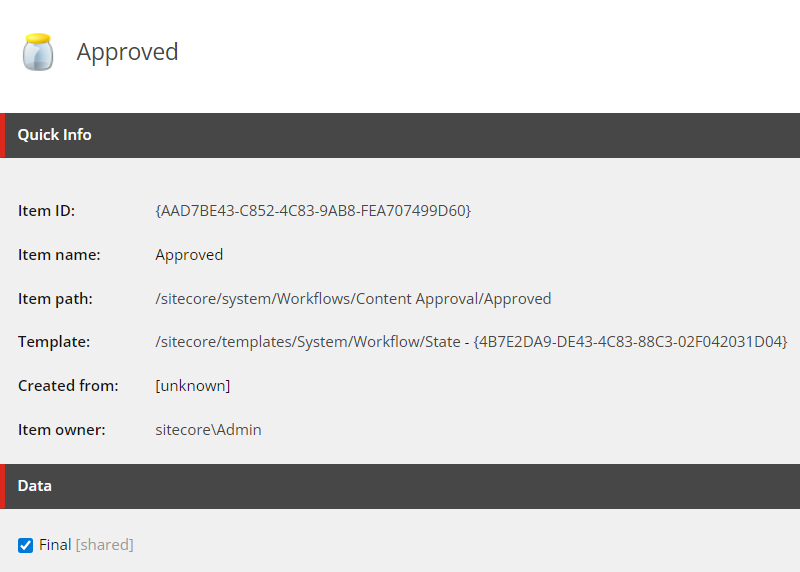
Of note, you must select which of the states is your final state. It is a checkbox available on each state so ensure that only the Approved state has it checked as that is the desired “Final state”.
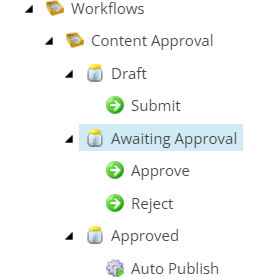
In the end, your Content Approval Workflow structure in the Content Editor should look like the following:
Step 4: Add the Content Approval Workflow to the Desired Templates
In this final step, you add the Content Approval Workflow to the desired templates. This is targeted at the Standard Values of the desired template(s), and you can target the very root template for your content if you want the Content Approval Workflow to apply to all templates.
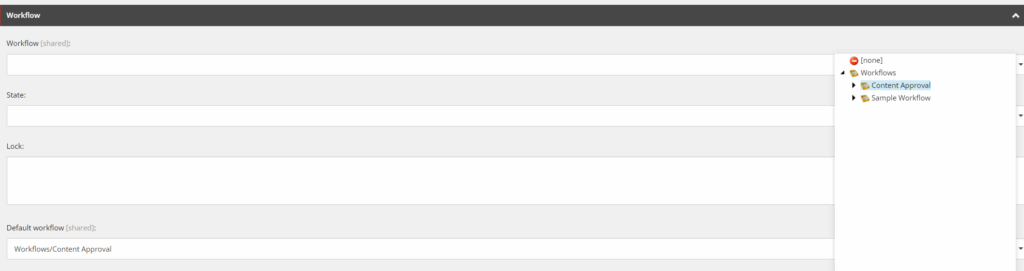
Of note, you have to select the Standard Fields options from the View tab to access the Workflow section of a template.

Once this is selected, you will see the very last section in the Standard Value item of “Workflow”. It is here that you can assign the Content Approval Workflow to the template so that any items based on the template are subject to the Content Approval Workflow.
Conclusion and Supporting Links
While the steps above can help you establish a basic Content Approval Workflow, the following supporting links allow you to expand more into Sitecore Workflows, inclusive of Emergency Approvals and Scheduled Publishing.
Workflow Cookbook: Workflow cookbook
Workflows and the Workbox: Workflows and the Workbox
Assign a Workflow to a Template: Assign a workflow to a template
The Workbox Commands: The Workbox commands
Emergency Approval/Publishing: Skip workflow steps for administrators and developers
Scheduled Publishing: Sitecore Workflows: Scheduled Publishing